How to Connect Two Cloudplate Rack Fans
The Cloudplate series of rack cooling fans is the smart choice for cooling your rack’s equipment, capable of powerful intake or exhaust. With its smart controls, the racking cooling fan can react to temperature changes and adjust its fan speed accordingly. Connecting multiple rack fan units creates an airflow system that takes in cool air and exhausts hot air.
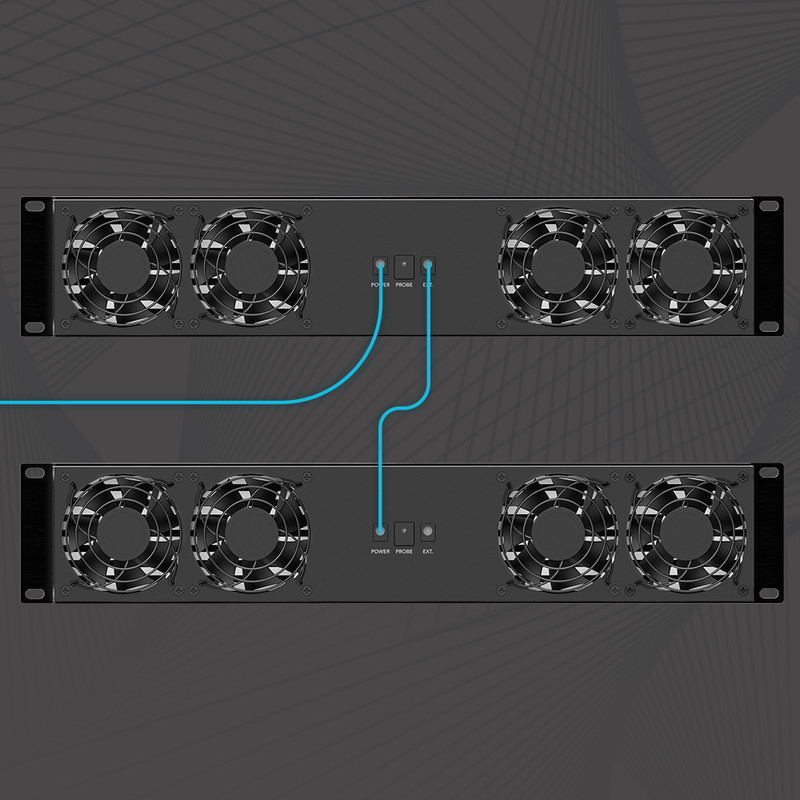
Recently our feedback has reflected some trouble with daisy chaining additional Cloudplates to each other so here, we’re going to show you where to connect the daisy chain cord.
The extension (EXT) port allows you to connect an additional unit (slave), which can be controlled using the parent unit (master) and will share the same temperature control settings. To sync the two CLOUDPLATE fans’ settings, set the slave unit’s fan speed to max, turn off its alarm setting and leave it in SPEED mode. To daisy chain two units together, plug in the included daisy chain cord into the master unit’s EXT port. Plug the cord’s other end into the slave unit’s power port.
CLOUDPLATE fans can also be controlled using the CONTROLLER 12 rack cabinet unit. All CLOUDPLATE fan units (slave) must set their fan speeds to max, disable their alarms, and left on SPEED mode, and be connected to the 12V DC EXT ports in order to be controlled by the CONTROLLER 12 (master).
The two 5V DC USB ports are used to support AIRPLATE cabinet fans and MULTIFAN component USB fans. Connected units (slave) must have their fan speed set to max in order to be controlled by the CONTROLLER 12 (master). No settings are required if the USB fans are not equipped with a speed controller.